
Astro makes it supremely easy to localize your website. With just a little extra work, you can handle static content localization—things like content collections, pages, and components. And that’s exactly what we covered in part one of this mini-series on Astro localization where we built the first version of a recipes website.
This time, we’re diving into dynamic content localization: those smaller bits of text, like button labels, navigation menus, and error messages, that are often hardcoded or scattered throughout your project.
While Astro’s built-in features are perfect for static content, we’ll need to look to external tools to help us with dynamic content localization.
Choosing your localization library
One of Astro’s strengths is that you get access to the full JavaScript ecosystem. That means we’re spoiled for choice when it comes to localization libraries. However, a handful of contenders stand out, including:
- i18next: Arguably one of the more popular options, meaning it is battle-tested, comes with a ton of plugins, and handles everything from simple one-for-one translations to complex pluralization rules.
- FormatJS: The power behind the popular react-intl library, its core tools work great without React. It’s particularly good at handling the harder elements of localization like number formatting and relative dates across different locales.
- Lingui: This one flies a bit under the radar but has strong TypeScript support and build-time optimizations that keep your bundle lean. It’s a good choice for TypeScript-heavy projects where performance is a priority.
- Paraglide: A newer library gaining traction among Astro developers. Its focus is on delivering efficient translation bundles through compile-time optimizations, making it ideal for projects where minimal bundle size and fast load times are critical.
For this tutorial, we’ll use paraglide-astro, focusing on core features of Paraglide to get you started. For advanced features like rich text formatting or integrating external translation services, check out the official Paraglide documentation.
So, why are we choosing Paraglide? Partly it’s because despite its popularity i18next is not yet compatible with Astro 5, at least not at the time of writing. But there are strong positive reasons in favor of using Paraglide, including:
- Integration with Astro’s i18n: Paraglide works well with Astro’s built-in routing and static content localization features.
- Full TypeScript support: Get compile-time checking of message keys and parameters.
- Optimized bundle size: Messages are automatically tree-shaken, so only translations used in client-side components (islands) are included in the JavaScript bundle.
Setting up paraglide-astro
If you followed along with part one of this mini-series, open the recipes project we created there. If you’re starting fresh, you can clone the completed code from the git repo. Either way, we’ll build on the foundations we laid down with Astro’s built-in i18n features.
Installation
Installation is quick and straightforward. Start out by installing the paraglide-astro package:
npm install @inlang/paraglide-astroCode language: CSS (css)And then initializing the project configuration:
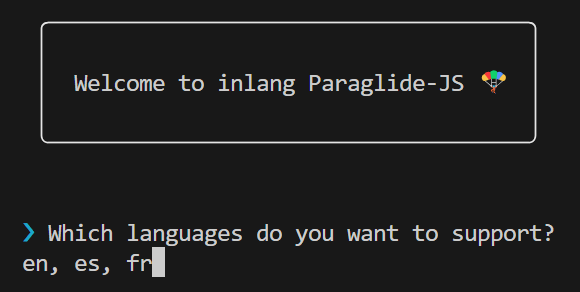
npx @inlang/paraglide-js initCode language: CSS (css)During these steps, you’ll need to answer a few questions about how you want to use paraglide-astro. Other than choosing the languages you want to offer your website visitors, you can almost certainly accept the defaults.
Understanding Paraglide’s project files
Paraglide sets up your project in stages:
- First, it creates project.inlang: this is the main configuration file where you define your languages and how translations should be handled.
- Then it creates a messages directory where you’ll store your translation files.
- Finally, when you run your first build, it creates a src/paraglide directory for your compiled translations.
Let’s take a moment to talk about that project.inlang filename. Paraglide is part of a larger project called Inlang, which includes editing tools, VS Code extensions, and a suite of other translation management features.
You’ll see references to Inlang throughout Paraglide’s documentation, but for this tutorial all we need to focus on is that project.inlang is where we’ll specify Paraglide’s settings.
Message files: where you store your translated strings
The messages directory might be where you spend most of your time longer term. You’ll find it at your project root, not in src or public. Why? Because it’s where we’ll put the translation files that Paraglide processes during build time, turning them into the JavaScript modules you’ll import in your components.
Inside this directory, you’ll have separate JSON files for each language you support:
messages/
en.json
es.json
fr.json
Let’s take a look at what’s inside these translation files. Here’s the English JSON file for our recipes site:
{
    "$schema": "https://inlang.com/schema/inlang-message-format",
    "siteName": "Astro Gastro Recipes",
    "chooseRecipe": "Choose a recipe",
    "chooseRecipeCategory": "Choose a {category} recipe",
    "home": "Home",
    "snacks": "Snacks",
    "dinner": "Dinner",
    "desserts": "Desserts",
    "header": "Choose a recipe",
    "prep": "Prep",
    "cook": "Cook",
    "difficulty": "Difficulty",
    "ingredients": "Ingredients",
    "viewRecipe": "View recipe",
    "allRights": "All rights reserved"
}
Code language: JSON / JSON with Comments (json)
If you’ve used other localization frameworks, you might be wondering about the flat structure. Paraglide doesn’t allow for nested objects and we’ll stick with the flat structure for this project. However, if you’re working with particularly large translation files you could use dot notation, instead:
{
  "nav.snacks": "Snacks",
  "nav.dinner": "Dinner",
  "nav.desserts": "Desserts"
}Code language: JSON / JSON with Comments (json)
H2: Localizing our navigation
At the end of the last installment, we had a website with recipes available in each language but the UI was all in English. Let’s start fixing that by localizing the site header:

In header.astro we’ll first import the localized strings:
import {
  home,
  snacks,
  dinner,
  desserts,
  siteName
} from "../paraglide/messages.js";Code language: JavaScript (javascript)
Each translation we import is actually a function that returns a string. When called, these functions return the appropriate translation for the current locale. That lets us pass data to the functions to handle things like interpolation, so we can insert data into the translations. We’ll cover that in a moment.
For now, we’re going to build our nav menu in the frontmatter, inserting the relevant string for each locale.
const navigation = [
  { name: home(), href: `/${currentLocale}` },
  { name: snacks(), href: `/${currentLocale}/snacks` },
  { name: dinner(), href: `/${currentLocale}/dinner` },
  { name: desserts(), href: `/${currentLocale}/dessert` },
];
Code language: JavaScript (javascript)
Then in the template, we iterate over the navigation object:
 <ul class="hidden md:flex md:gap-8">
        {navigation.map(item => (
          <li>
            <a
              href={item.href}
              class:list={[
                'inline-flex items-center px-1 py-2 text-sm font-medium text-gray-700 hover:text-emerald-600 transition-colors',
                currentPath === item.href ? 'text-emerald-600 border-b-2 border-emerald-600' : ''
              ]}
              aria-current={currentPath === item.href ? 'page' : undefined}
            >
              {item.name}
            </a>
          </li>
        ))}
      </ul>Code language: JavaScript (javascript)
Now when we visit the French version of the site, our nav looks like this:

We should also localize the site name and we can do that like this:
<a href={`/${currentLocale}`} class="flex items-center">
<span class="text-xl font-semibold text-gray-900">
          {siteName()}
        </span>
 </a>Code language: JavaScript (javascript)
So far, it’s pretty simple. Need a localized string? Just import the function for that string and call it in your component’s frontmatter. At build time, Astro’s internationalization tells Paraglide which locale it’s building at that moment, so you get back the right translation.
Adding dynamic values to your translations
Static translations are great, but most of the time you’ll need to insert dynamic values into your text. Take our recipe category pages. We want the header to say “Choose a dinner recipe” or “Choose a snack recipe” depending on which page you’re viewing.
Let’s look at how we handle this. First, here’s the message in our translation file:
{
  "chooseRecipeCategory": "Choose a {category} recipe"
}
Code language: JSON / JSON with Comments (json)
Just like template literals in JavaScript, {category} is a placeholder that gets populated with a value we provide. The way we use these values falls into three patterns:
- Passing in simple values:
{
  "chooseRecipeCategory": "Choose a {category} recipe"
}
Code language: JSON / JSON with Comments (json)
2. Passing in another translation:
{
  "chooseRecipeCategory": "Choose a {category} recipe"
}
Code language: JSON / JSON with Comments (json)
3. Using Paraglide’s plural syntax:
{
  "chooseRecipeCategory": "Choose a {category} recipe"
}
Code language: JSON / JSON with Comments (json)
The placeholders work the same way in all cases. What matters is what we pass in when we call the translation function.
In the case of our recipe listings header, we’re passing the category name. Here’s how we do that:
// First, import our translations
import {
  chooseRecipe,
  chooseRecipeCategory,
  snacks,
  dinner,
  desserts
} from "../paraglide/messages.js";

// We get the category (like "dinner") from props
const { category = "" } = Astro.props;

// We need to convert that string into the right translation function
const getCategoryTranslation = (category: string) => {
  switch(category) {
    case "snacks": return snacks;
    case "dinner": return dinner;
    case "desserts": return desserts;
    default: return null;
  }
};Code language: JavaScript (javascript)
There’s quite a bit to unpack there, so let’s break it down.
You might be tempted to write something like translations[category] to look up the right translation function, but that’s not type-safe as TypeScript can’t be sure that your category string actually matches a valid translation. By writing out the switch statement, we explicitly map each possible category to its translation function, so TypeScript can verify we’re doing the right thing.
Finally, we put it all together in our translated title. We need to do a few things here – get the right translation function for our category, turn that into the translated category name, and insert that into our “Choose a ___ recipe” string.
Here’s how that works:
const translatedTitle = category
  ? (() => {
      const categoryTranslation = getCategoryTranslation(category);
      return categoryTranslation
        ? chooseRecipeCategory({ category: categoryTranslation().toLowerCase() })
        : chooseRecipe();
    })()
  : chooseRecipe();Code language: JavaScript (javascript)
The code looks a bit complex, but it’s handling all our edge cases. No category? Fall back to “Choose a recipe“. Can’t find a translation for that category? Same thing. But when everything works, we get a nice localized heading like “Choisissez une recette de dîner” on our French version of the page.
Localizing links
Earlier, when we built our navigation, we manually constructed localized URLs by interpolating the current locale:
const navigation = [
  { name: home(), href: `/${currentLocale}` },
  { name: snacks(), href: `/${currentLocale}/snacks` },
];Code language: JavaScript (javascript)
While this approach works, Astro provides a more robust and maintainable way to handle localized URLs using the getRelativeLocaleUrl helper. This helper ensures that your links are correctly formatted based on the current locale, making your code cleaner and less error-prone.
In our recipe card, we define the link to the individual recipe like this:
import { getRelativeLocaleUrl } from 'astro:i18n';

const localizedLink = getRelativeLocaleUrl(currentLocale, `recipes/${slug}`);Code language: JavaScript (javascript)
Now, when we add a link to the recipe image, title, and button, we can be sure it’ll go to the correct localized version of that recipe.
Congrats, you’ve covered the basics of Astro localization!
Localization with Astro and Paraglide is pretty straightforward. Here’s a quick recap of what we’ve done across both parts of this tutorial:
- In part one, we used Astro’s built-in i18n features to set up static content localization, including language-specific folders, localized routing, and managing duplicate content across locales.
- In this part, we extended that foundation to handle dynamic content using Paraglide, working with translation files, dynamic values, and localized links.
Although we haven’t looked in depth at handling plurals, for example, we have covered the foundations so that you can get started with localizing your Astro sites. For the full code of the recipes website, take a look at our accompanying git repo.
Localization solutions
for developers
Automate the software localization process to eliminate
hassle and manual work, and seamlessly integrate
localization into your development cycle.


