Software localization
How to Localize React Apps with LinguiJS

If you’re a developer looking to internationalize your React applications, you might have heard of Lingui. It’s a JavaScript internationalization library that comes with a unique set of features like powerful CLI tooling, and rich-text support—all for only 1.7KB zipped.
In this guide, we will explore Lingui in depth and demonstrate how to use it with React to create multilingual applications. We’ll be going through a basic translation workflow, using Lingui’s unique translation macros and complete i18n support. Let’s rock!
Our demo app: MySoccerStat
We will make a dashboard page for a website named MySoccerStat which shows you all the stats for a football match.
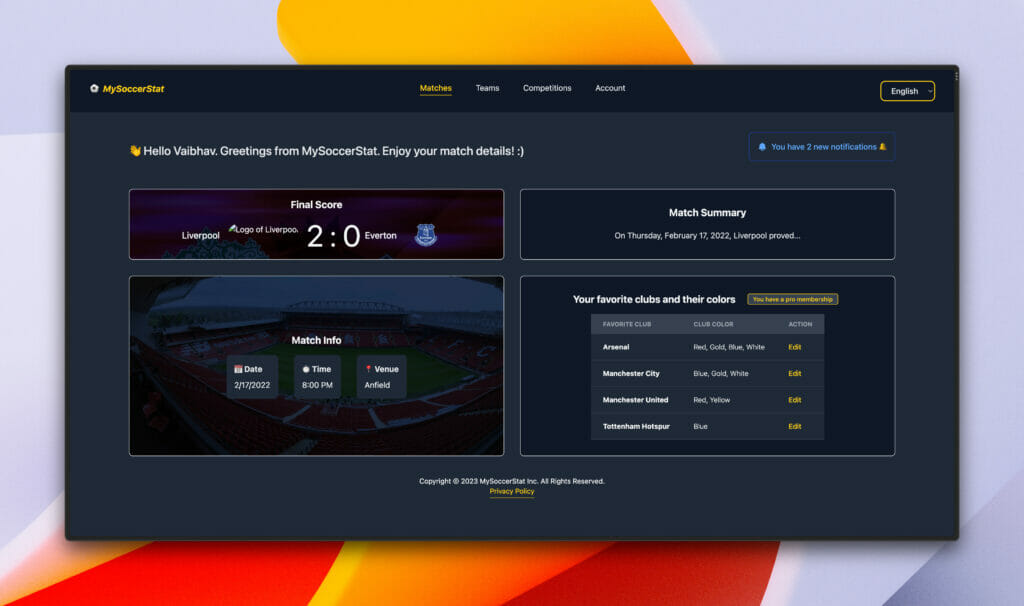
Our demo app showing the results of a Liverpool – Everton match
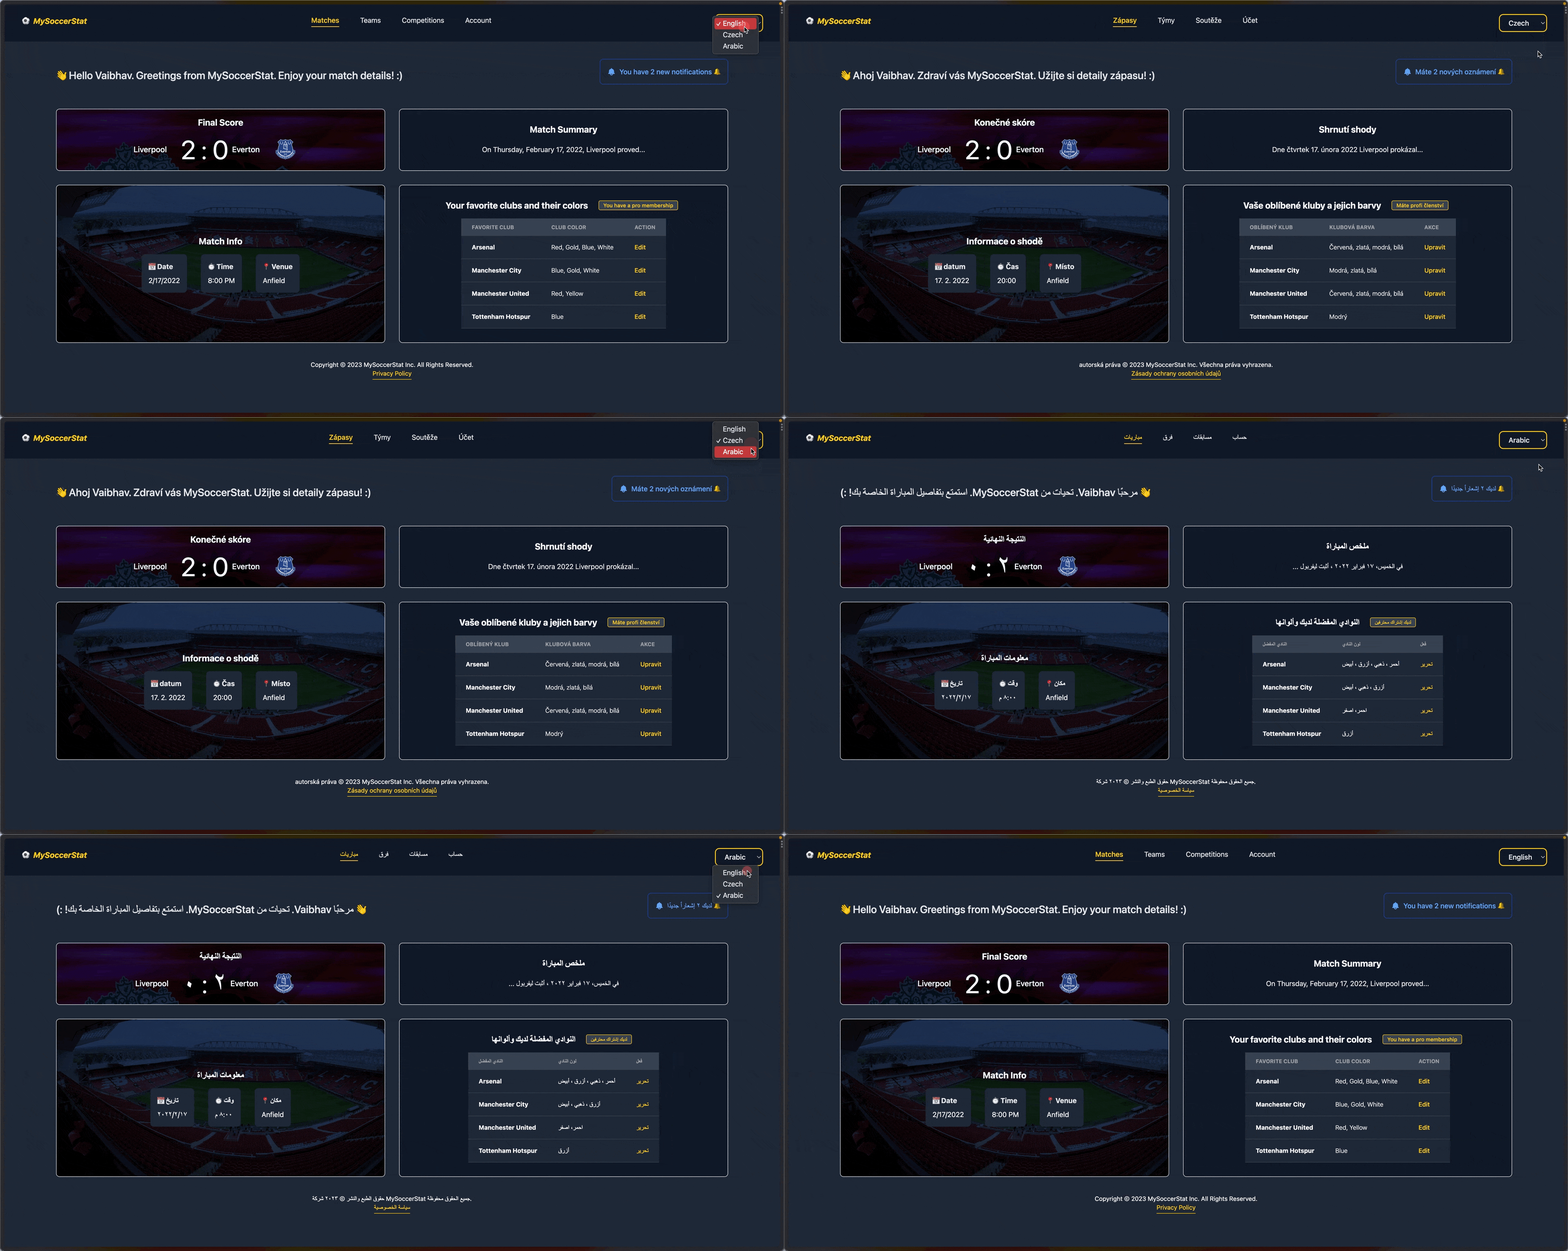
We can use the language switcher near the top-right corner to access the same app in three languages.
Let’s build this football app! We’ll need the following packages (version numbers in parentheses):
- React (18.2.0)
- lingui/react (3.17.1)
- lingui/cli (3.17.1)
- lingui/macro (3.17.1)
- make-plural (7.2.0)
- tailwindcss (3.2.6) — optional, used for styling
First, let’s use the Create React App CLI tool to bootstrap a new React project with the following command:
% npx create-react-app linguijs-cra-demoCode language: Bash (bash)Let’s quickly go over the components in our app before i18n. Our root App.js looks like the following:
// /src/app.js

import "./App.css";

import FavoriteClubs from "./components/FavoriteClubs";
import MatchInfo from "./components/MatchInfo";
import MatchStats from "./components/MatchStats";
import MatchSummary from "./components/MatchSummary";
import UserNotification from "./components/UserNotification";

function App() {
  return (
    {/* CSS classes removed for brevity. */}
    <div>
      <header>
        <nav>
          <a href="#">
            <span>⚽</span> MySoccerStat
          </a>
          <ul>
            <li><a href="#">Matches</a></li>
            {/* More nav links... */}
          </ul>
        </nav>
      </header>

      <div>
        <h2>👋</h2>
        <UserNotification />
      </div>

      <div>
        <MatchStats />
        <MatchSummary />
        <MatchInfo />
        <FavoriteClubs />
      </div>

      <footer id="footer">
          MySoccerStat Inc. All Rights Reserved.<br />
          <a href="/privacy">Privacy Policy</a>
      </footer>
    </div>
  );
}

export default App;Code language: JavaScript (javascript)
<App> contains main navigation, content components, and a footer at the end. The first of our content components is UserNotification. It shows an SVG icon with some text.
// /src/components/UserNotification.jsx

export default function UserNotification() {
  return (
    <div>
      <div>
        <svg>
          {/* ... */}
        </svg>

        <span>Info</span>
        <p>
          You have 2 new notifications
        </p>
      </div>
    </div>
  );
}Code language: JavaScript (javascript)
The MatchStats component shows you the final score of a match.
// /src/components/MatchStats.jsx

export default function MatchStats() {
  return (
    <div>
      <h3>Final Score</h3>

      <div>
        <h3>Liverpool</h3>
        <img .../>

        <span>2:0</span>

        <h3>Everton</h3>
        <img .../>
      </div>
    </div>
  );
}Code language: JavaScript (javascript)
The MatchSummary component has a heading and a summary text of the match.
// /src/components/MatchSummary.jsx

export default function MatchSummary() {
  return (
    <div>
      <h3>Match Summary</h3>

      <p>On Thursday, February 17, 2022, Liverpool proved...
      </p>
    </div>
  );
}Code language: JavaScript (javascript)
The MatchInfo component shows crucial information regarding the match, like date and time:
// /src/components/MatchInfo.jsx

export default function MatchInfo() {
  return (
    <div>
      <h3>Match Info</h3>

      <div>
        <ul>
          <li>
            <span>📅 Date</span>
            <span>2/17/2022</span>
          </li>

          <li>
	          <span>⏱️ Time</span>
            <span>8:00 PM</span>
          </li>

          {/* ... */}
        </ul>
      </div>
    </div>
  );
}Code language: JavaScript (javascript)
Our last content component, FavoriteClubs renders a <table> with the club information provided in an array.
// /src/components/FavoriteClubs.jsx

export default function FavoriteClubs() {
 const favoriteTeamLogoColors = [
    {
      id: 1,
      name: "Arsenal",
      color: "Red, Gold, Blue, White",
    },
    // ...
  ];

  return (
    <div>
      <h3>Your favorite clubs and their colors</h3>

      <div>
        <table>
          <thead>
            <tr>
              <th scope="col">Favorite Club</th>
              <th scope="col">Club Color</th>
              <th scope="col">Action</th>
            </tr>
          </thead>
          <tbody>
            {favoriteTeamLogoColors.map((color) => (
              <tr>
                <th scope="row">{color.name}</th>
                <th scope="row">{color.color}</th>
                <td><button>Edit</button></td>
              </tr>
            ))}
          </tbody>
        </table>
      </div>
    </div>
  );
}Code language: JavaScript (javascript)
🗒️ Note » You can find the starter project with all the component code on GitHub.
How do I internationalize a React app with Lingui?
With our base app set up, we can internationalize it and make it more dynamic. But first we need to understand the basic Lingui translation workflow. It goes like this:
- We add an
I18nProvidercomponent to ourApp. This provides the active locale and message catalogs to other components (more on this later). - We wrap all our string translation messages in Lingui’s
Transmacro. - We use Lingui’s CLI
extractcommand to extract translation messages from source files and create a message catalog for each locale. - We write our translations in the catalog (or our translators do).
- We use another CLI command,
compile, to create runtime catalogs. - Finally, we load the generated runtime catalogs in our app.
How do I set up and configure Lingui?
It’s time to connect Lingui in our React app! Let’s start by installing all the necessary dependencies:
% npm install --save-dev @lingui/cli @lingui/macro
% npm install --save @lingui/reactCode language: Bash (bash)
Let’s take a brief look at what these packages are.
@lingui/cli: this manages the app locales and helps extract the messages from source files to their catalogs.@lingui/macro: the macro package transforms JavaScript objects and JSX elements in our React app into ICUMessageFormatmessages.@lingui/react: the React components that handle active locale changes and interpolated variables.
Next, we will create a Lingui config file at the root of our app with the following code:
// .linguirc

{
  "locales": [
    "en-US",
    "cs-CZ",
  ],
  "sourceLocale": "en-US",
  "catalogs": [
    {
      "path": "src/locales/{locale}/messages",
      "include": [
        "src"
      ]
    }
  ],
  "format": "po"
}Code language: JSON / JSON with Comments (json)
We are defining our supported locales in the locales array using en-US as the default sourceLocale. Inside the catalogs array, we define the file path to write the extracted translation messages. For example, the message catalog for the cs-CZ locale will be in the src/locales/en/messages.po file. We are passing the po format since we want the message catalog format to be in a PO file that looks like this:
msgid "MessageID"
msgstr "Translated Message"Code language: plaintext (plaintext)
We also define an include array of paths where Lingui should look for translations in our code (the entire src directory in our case).
Now let’s add 2 new scripts to our package.json, which will help to both extract and compile our translations:
// package.json

...
{
   "scripts": {
      "extract": "lingui extract",
      "compile": "lingui compile"
   }
}
...Code language: JSON / JSON with Comments (json)
To ensure everything is set up correctly, let’s run the following extract command:
% npm run extractCode language: Bash (bash)Two new directories should be created:
/src/locales/en-US/src/locales/cs-CZ
The last step in config is telling our app components to read information about the current locale and message catalogs (which we’ll generate later) from Lingui. To do this, we’ll open our index.js file and wrap our App component inside Lingui’s I18nProvider.
// /src/index.js

import React from "react";
import ReactDOM from "react-dom/client";
import App from "./App";
import "./index.css";

import { i18n } from "@lingui/core";
import { I18nProvider } from "@lingui/react";

const I18nApp = () => {
  return (
    <React.StrictMode>

      {/* We pass the i18n instance to the provider */}
      <I18nProvider i18n={i18n}>
        <App  />
      </I18nProvider>

    </React.StrictMode>
  );
};

const root = ReactDOM.createRoot(document.getElementById("root"));
root.render(<I18nApp />);Code language: JavaScript (javascript)
And that completes our setup!
What are Lingui macros?
Before we localize our app, let’s take a moment to go over one of Lingui’s unique features. Like other React i18n libraries, Lingui has handy components that help us localize our apps. In addition, Lingui also has what it calls macros. Macros are functions that execute at compile time; they simplify writing messages.
Some macros provided by Lingui are t, plural, and defineMessage. Using these macros, we don’t need to learn the ICU MessageFormat syntax or use properties in components to define messages. We can write our JS and JSX code in a concise React-friendly way, letting macros handle the rest.
🔗 Resource » If you want to know more about ICU, The Missing Guide to the ICU Message Format has you covered.
Take the Trans macro, for example. Its equivalent Trans component can be a bit cumbersome to use. We can use the macro version instead:
// Here we're using the *macro* 👇...
import { Trans } from '@lingui/macro'

// ...
<Trans>Welcome, {userName} 👋</Trans>
// ...Code language: JavaScript (javascript)
//...at compile time, Lingui turns the macro
// into a normal *component* 👇
import { Trans } from '@lingui/react'
<Trans id="Welcome, {name} 👋" values={{ userName }} />Code language: JavaScript (javascript)The Trans macro also supports the comment prop which is a string where the translators can write comments:
import { Trans } from '@lingui/macro'

// ...
<Trans comment="A greeting message for the user">Welcome, {userName} 👋</Trans>Code language: JavaScript (javascript)import { t } from "@lingui/macro"
t`Welcome, ${name} 👋`
// 🔄 Transforms into:
import { i18n } from "@lingui/core"
i18n._("Welcome {name} 👋", { name })Code language: JavaScript (javascript)How do I localize my components with Lingui?
Let’s switch back to our code and prepare our app for translation. In App.js, we see that our navigation has static text that we can translate. For this, let’s wrap the first <li> with the Trans macro:
// /src/App.js

import { Trans } from "@lingui/macro";

function App() {
  return (
    <div>
     	{/* ... */}
      <ul>
        <li>
          <a href="#">
            <Trans>Matches</Trans>
          </a>
        </li>
      </ul>
      {/* ... */}
    </div>
  );
}

export default App;Code language: JavaScript (javascript)
We need to make sure to wrap all the static text across other components with the <Trans> component, as shown above.
Extracting messages
The Trans macro will generate messages under the hood. These messages must now be extracted from our source code into external message catalogs. You’ll remember that we configured these catalogs in the .linguirc file earlier. Let’s run the following command to extract the messages:
% npm run extractCode language: Bash (bash)In addition to extracting messages to files, the command will display a catalog stats table. This is handy, since it shows each locale’s total catalog count and missing translation values. OK, let’s add our translations next.
Adding translations
It’s time to open the /locales/cs-CZ/messages.po file and add the corresponding msgstr values to its msgid for all the app components:
// src/locales/cs-CZ/messages.po

msgid ""
msgstr ""

#: src/App.js:35
msgid "Matches"
msgstr "Zápasy"

#: src/components/FavoriteClubs.jsx:61
msgid "Action"
msgstr "Akce"

#: src/components/MatchStats.jsx:16
msgid "Final Score"
msgstr "Konečné skóre"

# ...Code language: plaintext (plaintext)
If we run the extract command again, it shows 0 on the cs-CZ row in the command output, meaning we no longer have missing Czech translations.
Compiling translations
Before the messages are loaded in our app, we must compile them. Let’s use the following command to do so:
% npm run compileCode language: Bash (bash)This command compiles the message catalogs and outputs a minified JavaScript file. You should now see a new file for each locale, namely:
/src/locales/en-US/messages.js/src/locales/cs-CZ/messages.js
Loading runtime translations
Finally, we will load these generated files into our app. For this, we return to the index.js file and use i18n‘s load and activate methods:
// /src/index.js

...
import { messages as enMessages } from './locales/en-US/messages'
import { messages as csMessages } from './locales/cs-CZ/messages'

i18n.load({
  en: enMessages,
  cs: csMessages,
});
i18n.activate("cs-CZ");

const I18nApp = () => {
  return (
    <React.StrictMode>
      <I18nProvider i18n={i18n}>
        <App  />
      </I18nProvider>
    </React.StrictMode>
  );
};
...Code language: JavaScript (javascript)
The i18n.load() method loads a translation file for each of our supported locales. The i18n.activate() method is switched to the given locale. This means that the new locale will be set as an active locale and the components will re-render with the newly selected locale messages. If we run the app, we can see our components are translated into Czech.
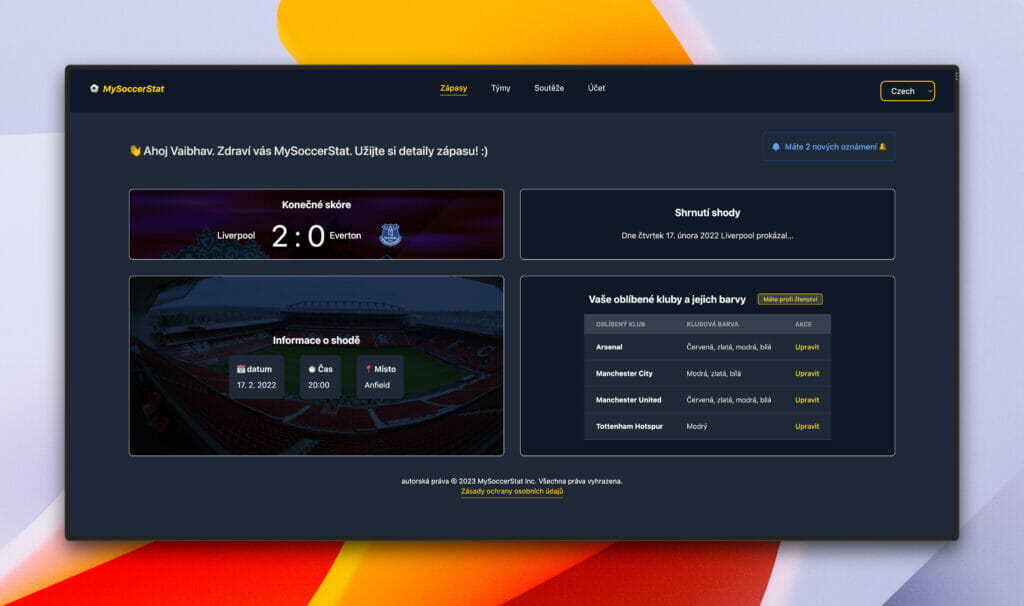
We have basic translation!
✋ Heads up » We’ll follow the same workflow throughout the tutorial, but we’ll spare you the monotony of repeating the steps in each upcoming section. So make sure to always run the extract command, add your translated message in the messages.po files, and run the compile command to see the results.
How do I add dynamic values to translation messages?
Sometimes we want to have a variable in the middle of a translation message. For this, we can use the <Trans> macro like this:
import { Trans } from "@lingui/macro";

const downloadedFileName = "user-data";

function MyComponent() {
	return (
	  <Trans>File {downloadedFileName}.zip downloaded!</Trans>
	);
}Code language: JavaScript (javascript)
Note the {variable} syntax here. When we extract this translation, we will get our translation message code like this:
#: src/App.js:61
msgid "File {downloadedFileName}.zip downloaded!"
msgstr ""Code language: JSON / JSON with Comments (json)
We can now simply add the translation message string value like this for the translation to show up:
// /src/locales/cs-CZ/messages.po

#: src/App.js:61
msgid "File {downloadedFileName}.zip downloaded!"
msgstr "Soubor {downloadedFileName}.zip stáhnout!"


// /src/locales/ar-EG/messages.po
#: src/App.js:61
msgid "File {downloadedFileName}.zip downloaded!"
msgstr "تم تنزيل المتف {downloadedFileName}.zip"Code language: JSON / JSON with Comments (json)
Here’s how it will look like in all 3 locales:

Using simple variables in English (en-US).

Using simple variables in Czech (cs-CZ).

Using simple variables in Arabic (ar-EG).
How do I localize messages with plurals?
Different languages have different numbers of plural forms. English has 2 forms: one (”You have 1 notification”) and other (”You have 3 notifications”). Czech has 3 plural forms. Some languages have more.
Arabic, for example, has 6 plural forms. Let’s add Egyptian Arabic (ar-EG) to our app to see how to work with more complex plurals.
// .linguirc

// ...

"locales": [
    "en-US",
    "cs-CZ",
    "ar-EG" // Adding a new locale
  ],

// ...Code language: JSON / JSON with Comments (json)
🗒️ Note » We’ve added a region-specific locale here (ar-EG), not just a language (ar). This is because later we’ll work with dates and times, and those are region-specific.
Next, we’ll run the extract command to generate a new catalog file under the /src/locales/ar-EG/ directory and fill in all the msgstr values in Arabic. Finally, let’s load the new catalog in the index.js file:
// /src/index.js

// ...
import { messages as arMessages } from './locales/ar-EG/messages'

i18n.load({
  en: enMessages,
  cs: csMessages,
  "ar-EG": arMessages
});
...Code language: JavaScript (javascript)
When we run compile and change the active locale to ar-EG, we should see the Arabic message strings displayed in the app:
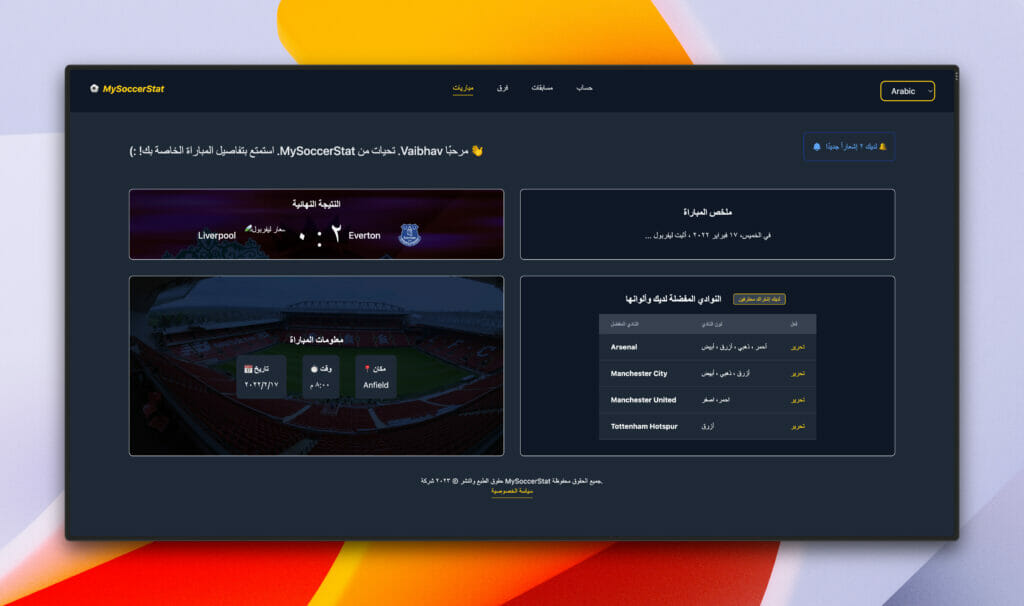
To help us with localized pluralization, we will install the make-plural package:
% npm install make-pluralCode language: Bash (bash)This package provides useful JavaScript functions to determine pluralization categories of the different languages used in the app. Let’s import the en, cs, and ar functions from make-plural and use them to identify our supported app locales:
// /src/index.js

// ...
import { en, cs, ar } from "make-plural/plurals";

// ...

// 👇 We connect make-plurals functions with Lingui
// using the `localLocaleData()` method.
i18n.loadLocaleData({
  en: { plurals: en },
  cs: { plurals: cs },
  "ar-EG": { plurals: ar },
});

// ...Code language: JavaScript (javascript)
We have a pluralization set up; let’s use Lingui’s <Plural /> component to localize a message inside <UserNotification>. We will pluralize the text “You have 2 new notifications” inside the <p> tag:
// /src/components/UserNotification.jsx

import { Plural } from "@lingui/macro";

export default function UserNotification() {
  return (
    <div>
     {/* ... */}
        <p>
          <Plural
            value={notificationCount}
            one="You have 1 new notification"
            other="You have # new notifications"
          />
        </p>
    </div>
  );
}Code language: JavaScript (javascript)
The Plural component takes props like one and many, as shown above, depending on different locals. English has singular (one) and plural/zero (other). The actual number of notifications is notificationCount. Supposing this 1, it will render “You have 1 new notification”. If there are 3 notifications, then it will render “You have 3 new notifications”.
Right now, we are only focussing on the en locale, but we need to take care of the other 2 locales and its supported plural forms. Czech has few, many, and other forms. Arabic has all of these, and adds zero and two forms. Let’s add all the missing plural forms:
// /src/components/UserNotification.jsx

// ...
        <p>
          <Plural
            value={notificationCount}
            zero="Oops! There are no notifications in your inbox"
            one="You have # new notification"
						two="You have 2 new notifications"
            few="You have a few new notifications"
            many="You have many new notifications!"
            other="You have # new notifications 🔔"
          />
        </p>Code language: JavaScript (javascript)
We’ve now made the notification number dynamic: # will be replaced by notificationCount in the final render.
Suppose we have a special case where three notifications needs its own message. We can use a _3 message that overrides the active locale’s plural forms in this case. (Of course, we could use any integer we wanted here.)
// /src/components/UserNotification.jsx

const notificationCount = 3;

// ...

        <p>
          <Plural
            value={notificationCount}
	          zero="Oops! There are no notifications in your inbox"
            one="You have # new notification"
	          _3="You have 3 new notifications"
						two="You have 2 new notifications"
            few="You have a few new notifications"
            many="You have many new notifications!"
            other="You have # new notifications 🔔"
          />
        </p>Code language: JavaScript (javascript)
Note that exact forms like _3 always take precedence over the active locale’s plural forms.
Now let’s assume we have a userName variable, and we want to customize our notification message based on this value on the zero exact form. For this, we can wrap the message in the Trans macro:
// /src/components/UserNotification.jsx

const notificationCount = 2;
const userName = "Vaibhav";
     ...
       <p>
          <Plural
            value={notificationCount}
	          zero={
              <Trans>
                Oops! There are <strong>#</strong> notifications in your inbox,
                {" "}
                {userName}!
              </Trans>
            }
            one="You have # new notification"
	          _3="You have 3 new notifications"
						two="You have 2 new notifications"
            few="You have a few new notifications"
            many="You have many new notifications!"
            other="You have # new notifications 🔔"
          />
        </p>Code language: JavaScript (javascript)
We can easily use nested macros, components, variables, or template literals for more flexibility. After extraction, you will see the msgid in your message catalog like this:
#: src/components/UserNotification.jsx:32
msgid "{notificationCount, plural, zero { Oops! There are <0>#</0> notifications in your inbox, {userName}!} one {You have # new notification} two {You have 2 new notifications. Hehe} =3 {You have 3 new notifications} few {You have a few new notifications} many {You have many new notifications!} other {You have # new notifications 🔔}}"Code language: JSON / JSON with Comments (json)
It shows that the message depends on the notificationCount variable and has the 0, one, 3, few, many and the other exact forms where we can add the respective msgstr values in each locale:
// /src/locales/cs-CZ/messages.po

msgstr "{notificationCount, plural, zero { Jejda! Ve vaší doručené poště máte <0>#</0> oznámení, {userName}!} one {Máte # nových oznámení} two {Máte 2 nová oznámení. Hehe} =3 {Máte tři nová oznámení} few {Máte několik nových oznámení} many {Máte mnoho nových oznámení!} other {Máte # nových oznámení 🔔}}"

// /src/locales/ar-EG/messages.po
msgstr "{notificationCount, plural, zero {أُووبس! هناك إشعارات <0> # </0> في بريدك الوارد ، {userName}!} one {لديك # إشعارًا جديدًا} two {لديك إشعاران جديدان. هيهي} =3 {You have 3 new notifications} few {You have a few new notifications} many {You have many new notifications!} other {You have # new notifications 🔔}}"Code language: JSON / JSON with Comments (json)
Now our notification component should look like this in cs-CZ and ar-EG locales:

UserNotification component in Czech (cs-CZ).

UserNotification component in Arabic (ar-EG).
Translating complex JSX code (with multiple children)
In our footer code, we can see it has a parent footer element with a child a tag that renders a privacy policy page. We localized the parent element earlier. But what about the child element?
JSX code with multiple elements can also be translated with Lingui’s Trans component. We wrap the entire footer content (along with its child a tag) with the Trans component like this:
// /src/App.js

// ...

<footer id="footer">
    <Trans>
        Copyright © {i18n.date(currentDate, { year: "numeric" })} MySoccerStat
        Inc. All Rights Reserved. <br />
        <a href="/privacy">Privacy Policy</a>
     </Trans>
 </footer>Code language: JavaScript (javascript)
After extraction, your message catalogs will look like this:
# /src/locales/ar-EG/messages.po

#: src/App.js:65
msgid "Copyright © {1} MySoccerStat Inc. All Rights Reserved. <0/><1>Privacy Policy</1>"
msgstr "حقوق الطبع والنشر © {1} شركة MySoccerStat جميع الحقوق محفوظة. <0/> <1>سياسة الخصوصية</1>"Code language: plaintext (plaintext)
# /src/locales/ar-EG/messages.po
#: src/App.js:65
msgid "Copyright © {1} MySoccerStat Inc. All Rights Reserved. <0/><1>Privacy Policy</1>"
msgstr "حقوق الطبع والنشر © {1} شركة MySoccerStat جميع الحقوق محفوظة. <0/> <1>سياسة الخصوصية</1>"Code language: plaintext (plaintext)Lingui adds indexed placeholder tags <0><0/> to support React components and HTML tags. During runtime, these are replaced with the appropriate HTML.

The footer component in cs-CZ locale.

The footer component in ar-EG locale.
How do I localize dates and times?
Dates and times are region-specific values and so for translating we must change the locales to be region-specific too in the .linguirc config:
// .linguirc

{
  "locales": [
    "en-US",
    "cs-CZ",
    "ar-EG"
  ],
  ...
}Code language: JSON / JSON with Comments (json)
We use dates in our soccer app in 2 places, in the MatchInfo component and the footer. Let’s start with formatting dates in the footer first.
Lingui uses the i18n.date() method to format dates. We get this method via the useLingui hook. date() returns a formatted date using JavaScript’s built-in Intl.DateTimeFormat.
// /src/App.js

// ...
import { useLingui } from "@lingui/react";

function App() {
	const { i18n } = useLingui();
	const currentDate = new Date();
	// ...

	// `date()` will format the date based on
	// the active locale 👇
	<footer>
	  Copyright © {i18n.date(currentDate, { year: "numeric" })} MySoccerStat
	  Inc. All Rights Reserved. <br />
	  <a href="/privacy" >Privacy Policy</a>
	</footer>
}Code language: JavaScript (javascript)
🗒️ Note » The second parameter to date() takes formatting options based on the Intl.DateTimeFormat constructor, which Lingui uses underneath the hood.

Date formatting in cs-CZ locale.

Date formatting in ar-EG locale.
In the MatchInfo component code, we have a date and a time. Formatting times is very similar to formatting dates.
// /src/components/MatchInfo.jsx

import { useLingui } from "@lingui/react";

// ...

export default function MatchInfo() {

  const { i18n } = useLingui();
  const matchDate = new Date("2022-02-17T20:00");

  return (
    <div>
      {/* ... */}
        <ul>
          <li>
            <span>
              <Trans>📅 Date</Trans>
            </span>
            <span>{i18n.date(matchDate)}</span>
          </li>
          <li>
            <span>
              <Trans>⏱️ Time</Trans>
            </span>

            {/* We display *only* the time portion of the date
                object using the active locale's short time
                format 👇 */}
            <span>{i18n.date(matchDate, { timeStyle: "short" })}</span>
          </li>
          {/* ... */}
        </ul>
    </div>
  );
}Code language: JavaScript (javascript)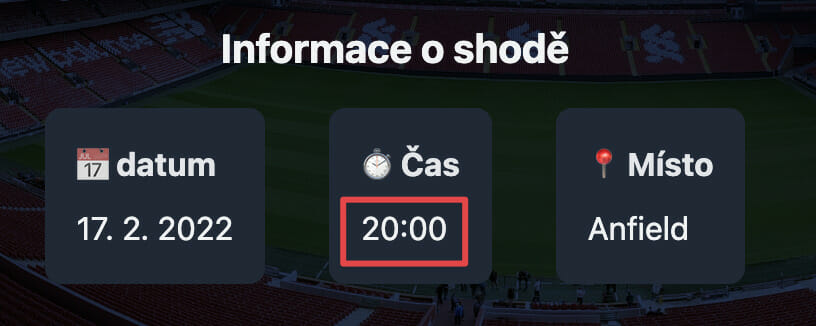
Time formatting in cs-CZ locale.
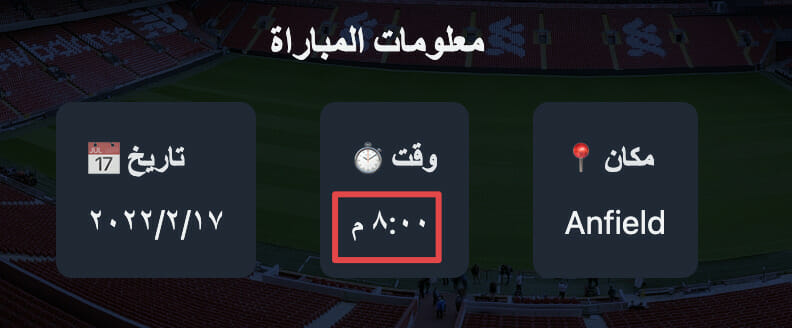
Time formatting in ar-EG locale.
How do I localize numbers?
The match score numbers need to be localized, particularly for Arabic. Unlike English and Czech, Arabic (confusingly) doesn’t use Western Arabic numerals (1, 2, 3). It uses Eastern Arabic numerals (١,٢,٣) instead. Here, we can use Lingui’s i18n.number() method.
// /src/components/MatchStats.jsx

import { i18n } from "@lingui/core";

// ...

export default function MatchStats() {
  return (
    <div>
      {/* ... */}
        <span>
          {/* Much like `date()`, `number()` uses the
              active locale to format its given number. */}
          {i18n.number(2)} : {i18n.number(0)}
        </span>
      {/* ... */}
    </div>
  );
}Code language: JavaScript (javascript)
Number formatting in cs-CZ locale.

Number formatting in ar-EG locale.
🗒️ Note » The second parameter to date() takes formatting options based on the Intl.NumberFormat constructor, which Lingui uses underneath the hood.
How do I load message catalogs dynamically?
If we look at our index.js file, we see all the locales (along with their plurals) are being eager loaded with the i18n.load() method call:
// /src/index.js

import { messages as enMessages } from './locales/en-US/messages'
import { messages as csMessages } from './locales/cs-CZ/messages'
import { messages as arMessages } from './locales/ar-EG/messages'

import { en, cs, ar } from "make-plural/plurals";

// ...

i18n.load({
  en: enMessages,
  cs: csMessages,
  "ar-EG": arMessages
});

// ...

i18n.loadLocaleData({
  en: { plurals: en },
  cs: { plurals: cs },
  "ar-EG": { plurals: ar },
});

// ...Code language: JavaScript (javascript)
But we only use one locale at a time in our app, so there’s no need to load all of our locales when our app starts. That’s where dynamic loading comes in handy.
Let’s start by creating a file to handle this called localeLoader.js. We’ll move locale-loading code from index.js to this new file:
// /src/localeLoader.js

import { i18n } from "@lingui/core";
import { en, cs, ar } from "make-plural/plurals";

export const locales = {
  "en-US": "English",
  "cs-CZ": "Czech",
  "ar-EG": "Arabic",
};

// We're adding a configuration variable:
// the default locale will be loaded when
// a visitor hits our site for the first
// time.
export const defaultLocale = "en-US";

i18n.loadLocaleData({
  en: { plurals: en },
  cs: { plurals: cs },
  "ar-EG": { plurals: ar },
});

i18n.load(defaultLocale, {});
i18n.activate(defaultLocale);Code language: JavaScript (javascript)
Now let’s write a function to dynamically load the message catalog of a given locale.
// /src/.localeLoader.js

// ...

export async function loadMessages(locale) {
  const { messages } = await import(`./locales/${locale}/messages`);

  // After we load the messages, we need to add them
  // to Lingui and tell it to activate the locale.
  i18n.load(locale, messages);
  i18n.activate(locale);
}Code language: JavaScript (javascript)
After we load the messages, we need to add them to Lingui and tell it to activate the associated locale.
With that in place, we can move back to the index.js file and load the default locale when the app loads.
// /src/index.js

import React, { useEffect } from "react";
// ...
import { defaultLocale, loadMessage } from "./localeLoader";

const I18nApp = () => {

  // 👇 Loading the default locale on
  //    first render.
  useEffect(() => {
    loadMessage(defaultLocale);
  }, []);

  return (
    <React.StrictMode>
      <I18nProvider i18n={i18n}>
        <App />
      </I18nProvider>
    </React.StrictMode>
  );
};

const root = ReactDOM.createRoot(document.getElementById("root"));
root.render(<I18nApp />);Code language: JavaScript (javascript)
How do I set the document direction right-to-left?
Finally, we can now change the direction of the text content on the webpage from ltr to rtl when the locale is ar-EG:
// /src/.localeLoader.js

// ...

export async function loadMessages(locale) {
  //...
  locale === "ar-EG" ? (document.getElementById("html").dir = "rtl") : "ltr";
}Code language: JavaScript (javascript)
How do I add a language switcher?
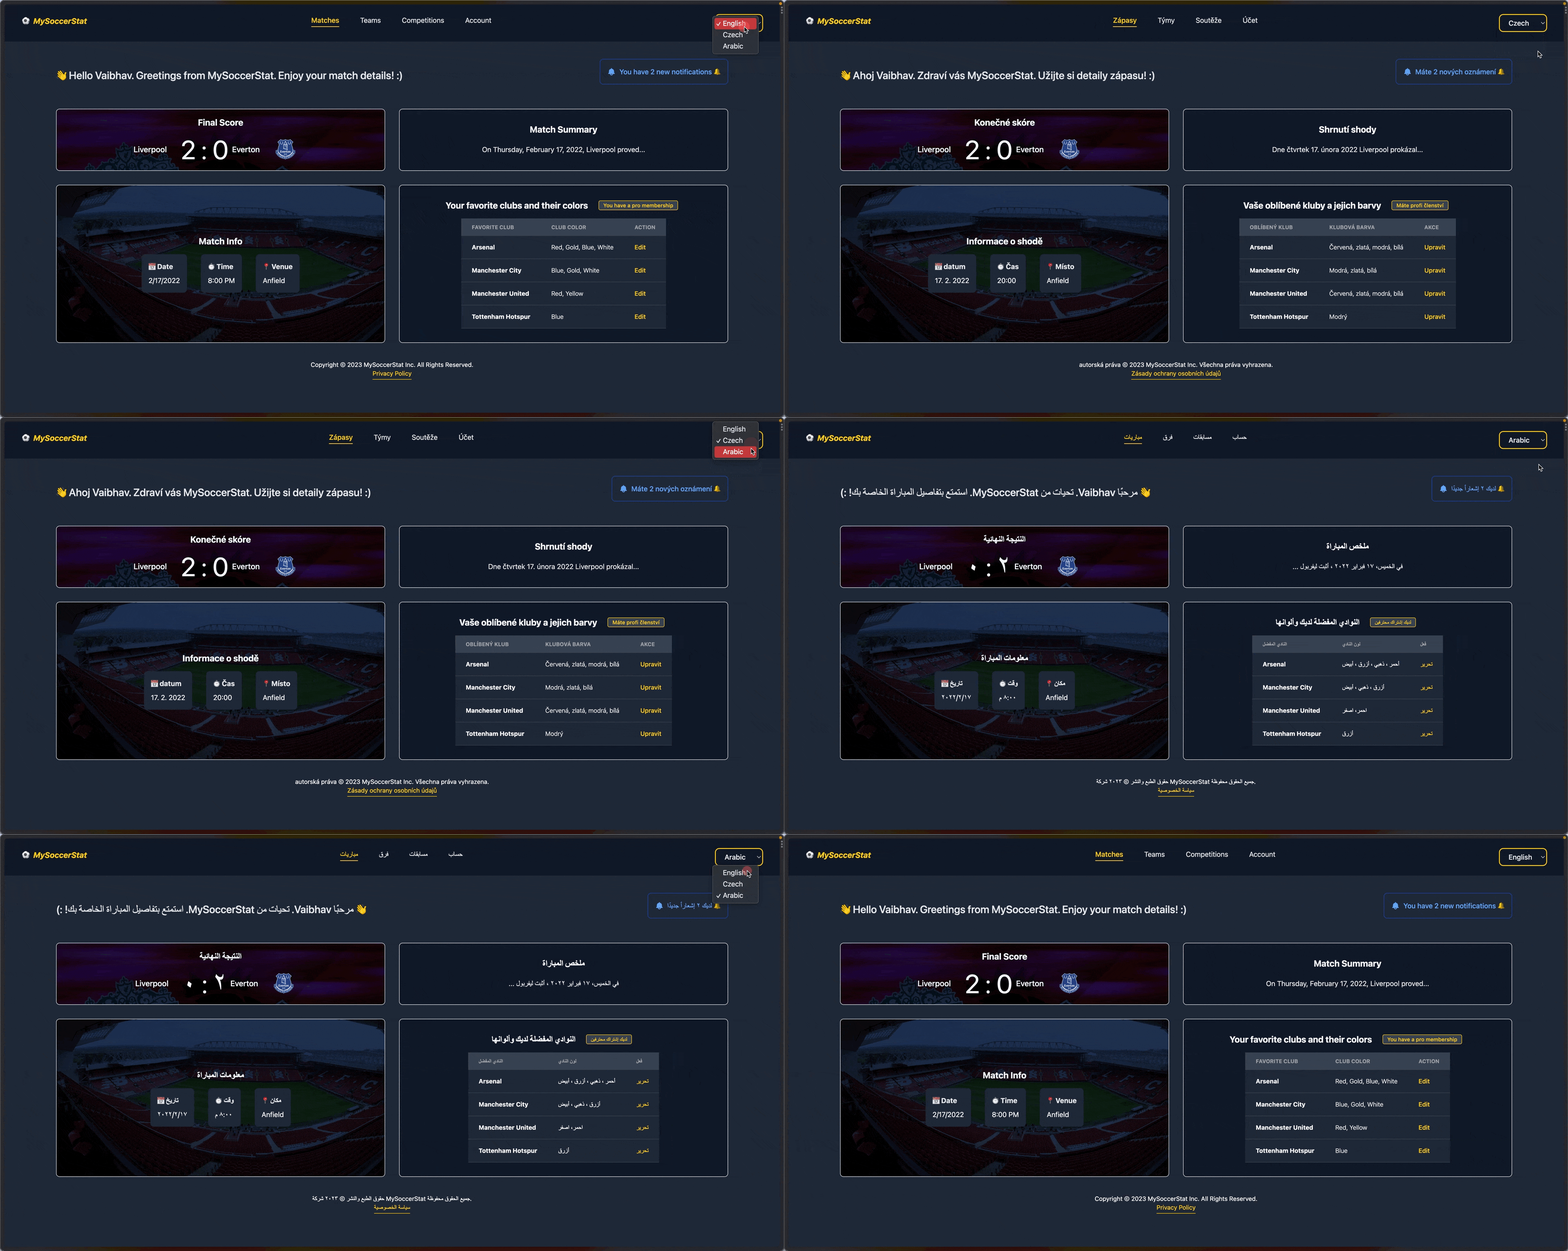
Let’s create a new component called LanguageSwitcher that uses a simple <select> to allow the visitor to select the language of their choice.
// /src/components/LanguageSwitcher.jsx

import { locales } from "../localeLoader";

export default function LanguageSwitcher({ locale, handleLocaleChange }) {
  return (
    <select
      value={locale}
      onChange={(e) => handleLocaleChange(e.target.value)}
    >
      {Object.keys(locales).map((key) => (
        <option value={key} key={key}>
          {locales[key]}
        </option>
      ))}
    </select>
  );
}Code language: JavaScript (javascript)
We pass in the locale and handleLocaleChange as parameters to the LanguageSwitcher function so that back in our App.js root component, we can pass them as props:
// /src/App.js

// ...
import LanguageSwitcher from "./components/LanguageSwitcher";
// ...

function App({ locale, handleLocaleChange }) {
  // ...

  return (
    <div>
      <header>
        <nav>
          {/* ... */}

          <LanguageSwitcher
            locale={locale}
            handleLocaleChange={handleLocaleChange}
          />
        </nav>
      </header>

      {/* ... */}

    </div>
  );
}

export default App;Code language: JavaScript (javascript)
To let the user change the language, we can add the active locale as a bit of React state. This will allow us to use our new loadMessage() function to switch Lingui’s active locale.
// /src/index.js

const I18nApp = () => {

  function changeLocale(locale) {
    setCurrentLocale(locale);
    loadMessage(locale);
  }

  const [currentLocale, setCurrentLocale] = useState(defaultLocale);

  return (
    <React.StrictMode>
      <I18nProvider i18n={i18n}>
        <App
          locale={currentLocale}
          handleLocaleChange={changeLocale}
        />
      </I18nProvider>
    </React.StrictMode>
  );
};

// ...Code language: JavaScript (javascript)
Make sure to to pass the locale and handleLocaleChange props to the <App> component:
// /src/index.js

// ...
return (
    <React.StrictMode>
      <I18nProvider i18n={i18n}>
        <App locale={currentLocale} handleLocaleChange={changeLocale} />
      </I18nProvider>
    </React.StrictMode>
  );
// ...Code language: JavaScript (javascript)
With that in place, your language switcher should dynamically load the messages!
How do I translate messages in JavaScript or attributes?
Lingui provides us with the t macro which is useful for translating messages in JavaScript and the HTML attributes. The t macro transforms a tagged template literal into a message in its corresponding ICU MessageFormat.
import { t } from "@lingui/macro"

const myMessage = t`Hello from the t macro!`Code language: JavaScript (javascript)
Let’s use it on our App.js file to create a localized welcome greeting:
// /src/App.js

import { t } from "@lingui/macro";

function App({ locale, handleLocaleChange }) {
  // ...
  const name = "Vaibhav";

  const message = t({
    id: "message.greeting",
    comment: "A greeting message for the user",
    message: `Hello ${name}. Greetings from MySoccerStat. Enjoy your match details! :)`,
  });

  return (
    <div>
      {/* ... */}
      <div>
        <h2>👋 {message}</h2>
        <UserNotification />
      </div>
      {/* ... */}
    </div>
  );
}

export default App;Code language: JavaScript (javascript)
The message we pass to t will be used as the default translation. The comment will also appear in our message catalogs like this:
// /src/locales/cs-CZ/messages.po
# ...

#. A greeting message for the user
#: src/App.js:17
msgid "message.greeting"
msgstr "Ahoj {name}. Zdraví vás MySoccerStat. Užijte si detaily zápasu! :)"Code language: JavaScript (javascript)
How do I define custom message IDs?
A message ID identifies a specific translation message. By default, Lingui uses the source language as the message ID (English in our case). Notice that in the following examples, the message ID in all 3 translations is "Matches":
// /src/locales/en-US/messages.po
#: src/App.js:35
msgid "Matches"
msgstr "Matches"Code language: JSON / JSON with Comments (json)
// /src/locales/cs-CZ/messages.po
#: src/App.js:35
msgid "Matches"
msgstr "Zápasy"Code language: JSON / JSON with Comments (json)// /src/locales/ar-EG/messages.po
#: src/App.js:35
msgid "Matches"
msgstr "مباريات"Code language: JSON / JSON with Comments (json)Under the hood, Lingui will explicity use this message ID as the id prop of the Trans component. However, we can override this behavior and use custom IDs for our messages. This can be helpful for working with localization string repositories, like Phrase.
Okay, back to our demo app. To create a custom ID for a translation, we can use the Trans macro, where we can add our own value to the id prop:
// /src/components/MatchSummary.jsx

import { Trans } from "@lingui/macro";
// ...

export default function MatchSummary() {
  return (
    <div>
      <h3>
        {/* 👇 Providing a custom ID for the message */}
        <Trans id="summary.title">Match Summary</Trans>
      </h3>
      <p>
	      <Trans id="summary.description">
	        {/* ... */}
	      </Trans>
      </p>
    </div>
  );
}Code language: JavaScript (javascript)
When we extract these messages, we find the msgid property has been updated:
// /src/locales/cs-CZ/messages.po

# ...

#: src/components/MatchSummary.jsx:11
msgid "summary.title"
msgstr "Shrnutí shody"

# ...Code language: plaintext (plaintext)
We can also use the t macro for custom IDs. Let’s update our MatchStats component to use custom ids in our images’ alt tags.
// /src/components/MatchStats.jsx

// ...
import { t } from "@lingui/macro";

// ...

export default function MatchStats() {
  return (
    <div>
     	{/* ... */}
      <div>
        <h3>Liverpool</h3>
        <img
          src="..."
          alt={t({ id: "liverpool.caption", message: "Logo of Liverpool" })}
        />
        {/* ... */}

        <h3>Everton</h3>
        <img
          src="..."
          alt={t({ id: "everton.caption", message: "Logo of Everton" })}
        />
      </div>
    </div>
  );
}Code language: JavaScript (javascript)
Now when we extract our messages, we see our message catalogs updated to use the new IDs:
// /src/locales/cs-CZ/messages.po

# ...
#: src/components/MatchStats.jsx:23
msgid "liverpool.caption"
msgstr "Logo Liverpoolu"
# ...Code language: JavaScript (javascript)
How can I select between translations messages dynamically?
Say we want add a member experience/point system to our app. We need to show whether the logged in user is a Basic, Pro, or Expert member, based on how many points they have. Of course, we want those messages that show a member’s tier to be localized. Let’s do this in our FavoriteClubs components. First we’ll declare our tier point thresholds and define our translation messages.
// /src/components/FavoriteClubs.jsx

// 👇 Lingui provides a `defineMessage` macro
//   that allows us to register a translation
//   message without immediately displaying it.
import { defineMessage } from "@lingui/macro";

const userSoccerXPBasic = 100;
const userSoccerXPPro = 1000;
const userSoccerXPExpert = 10000;

// 👇 Defining messages for later display.
const userSoccerXPMessages = {
  [userSoccerXpBasic]: defineMessage({
    message: "You have a basic membership",
  }),
  [userSoccerXpPro]: defineMessage({
    message: "You have a pro membership",
  }),
  [userSoccerXpExpert]: defineMessage({
    message: "You have an expert membership",
  }),
};Code language: JavaScript (javascript)
Now we can render these messages depending on the member’s current point count:
// /src/components/FavoriteClubs.jsx

// ...

// We add a prop to the component to recieve the current
// memeber's number of experience of points 👇
export default function FavoriteClubs({ userXPPoints }) {

  // ...
  return (
    <div>
      <div>
        {/* ... */}
        <span>
          {/* Here we actually display the message. Note
              that we're selecting it dynamically and not
              hard-coding its ID. */}
          <Trans id={userSoccerXPMessages[userXPPoints].id} />
        </span>
      </div>
      {/* ... */}
    </div>
  );
}Code language: JavaScript (javascript)
Finally, we can update our <App> to pass the current member’s point count to <FavoriteClubs>.
// /src/App.js

// ...
<FavoriteClubs userXPStatus={1000} />
// ...Code language: JavaScript (javascript)
This will render “You have a pro membership“ in the default en locale.
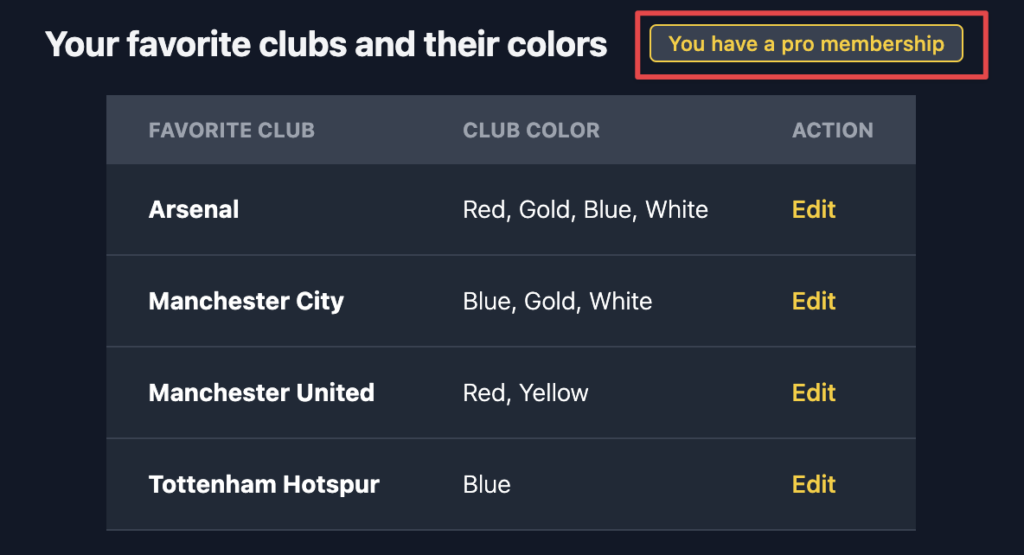
🗒️ Note » Lingui calls this pattern of selecting a translation at runtime lazy translations.
How can I delete unused translation messages?
The @lingui/cli package provides a lingui command to manage the extraction, merging, and compilation of message catalogs. Let’s see how we can use it to clean obsolete messages.
Throughout our demo app, whenever we were using the extract command, it would merge the new messages extracted from source files with the existing message catalogs.
Let’s say, for some reason, we don’t want to show the greeting message in our app (the one with ID message.greeting). Instead of manually removing the specific message catalog for this message, we can use the --clean option provided by Lingui to clean our message catalogs.
Let’s run the following command and see the magic:
% npm run extract --cleanCode language: Bash (bash)We can see that in each of our message catalog files for the 3 locales, Lingui has automatically commented out the msgid and msgstr values for us, as these messages are now obsolete.
How can I enforce translation completion?
One way to verify whether all the messages are translated is with the --strict option of the that can be used with the compile CLI command.
If we run the following:
% npm run compile --strictCode language: Bash (bash)We see that Lingui refuses to compile any message catalog that has missing translations.
> npm run compile --strict

Compiling message catalogs…
Missing 4 translation(s)Code language: Bash (bash)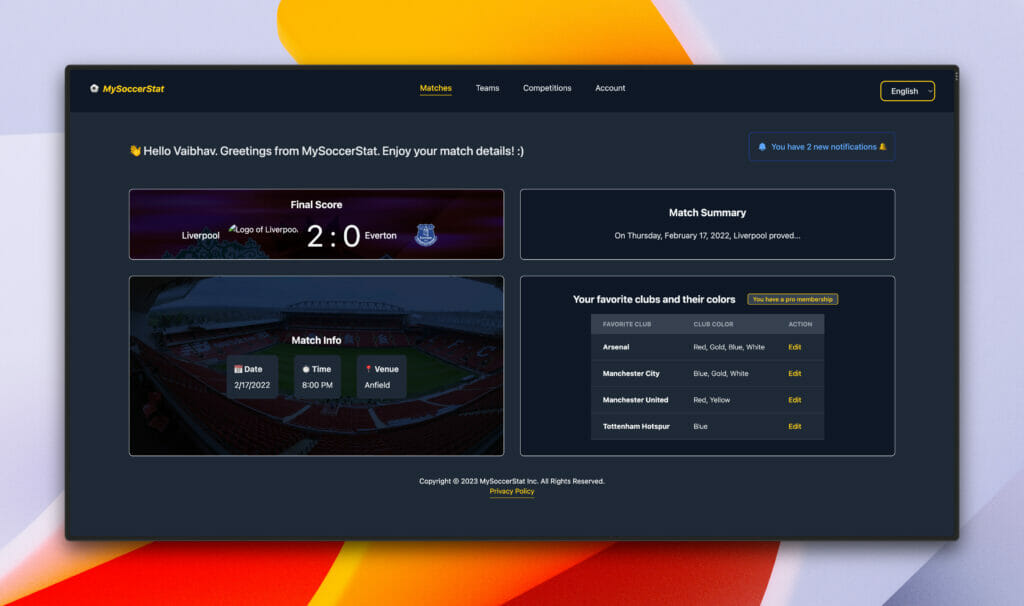
Our fully localized app in the en-US locale.
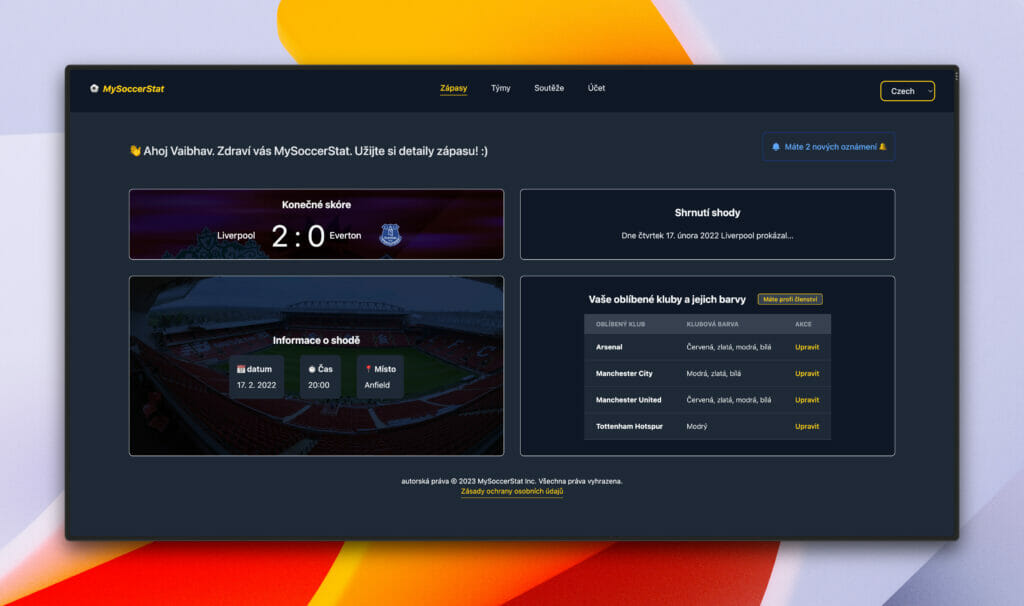
Our fully localized app in cs-CZ locale.
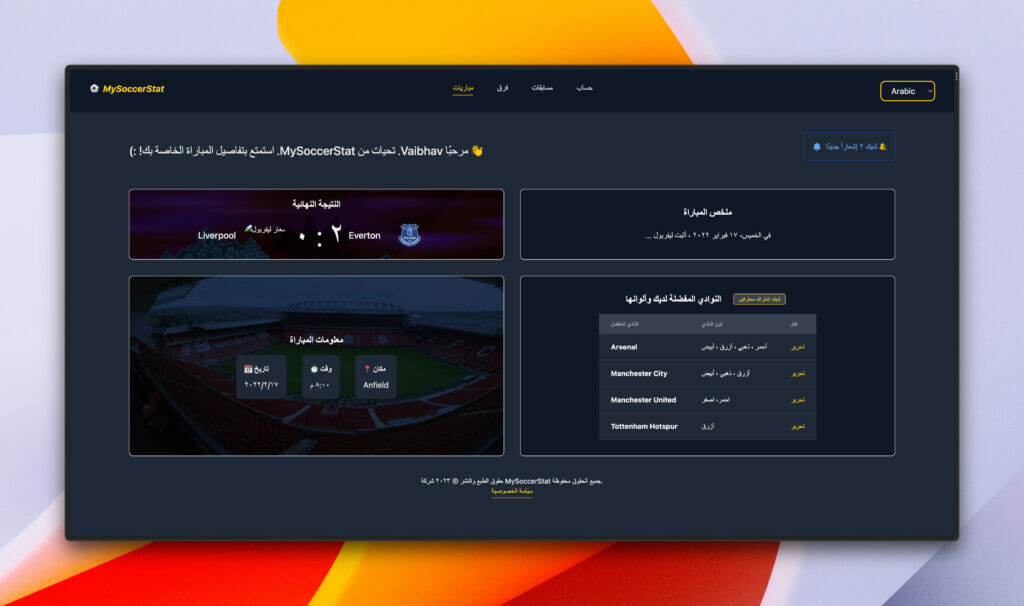
Our fully localized app in ar-EG locale.
🔗 Resource » You can get the complete code of our demo app from our GitHub repo.
Until next time
We learned about the Lingui workflow and how it translates your application with macros, components, extraction, and compilation. We also discussed advanced translation use cases like dynamically loading messages, creating custom IDs, and lazy translation methods.
We hope you enjoyed this article and learned a few things. If you’re ready to take your i18n game to the next level, check out the Phrase Localization Platform. The integrated suite of localization automation technology comes with a dedicated software localization platform, Phrase Strings.
With tons of tooling to automate your translation workflow and integrations with GitHub, GitLab, Bitbucket, and more, Phrase Strings can take care of the heavy lifting for i18n. Your translators pick up the localizations you’ve pushed and use Phrase Strings’ beautiful web panel to organize and translate into as many languages as needed.
When your translations are ready, you can easily pull them back into your project with a single command—or automatically—so you can stay focused on the code you love. Sign up for a free trial to see why developers love using Phrase Strings for software localization.
Phrase Strings
Take your web or mobile app global without any hassle
Adapt your software, website, or video game for global audiences with the leanest and most realiable software localization platform.


